Thursday, October 19, 2017

Barn Quilt Class part 2

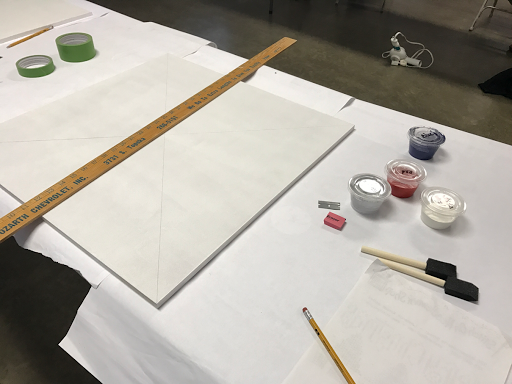
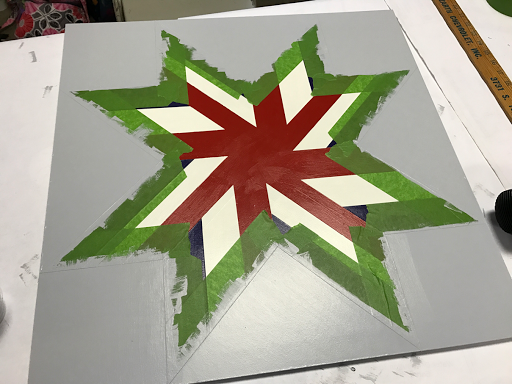
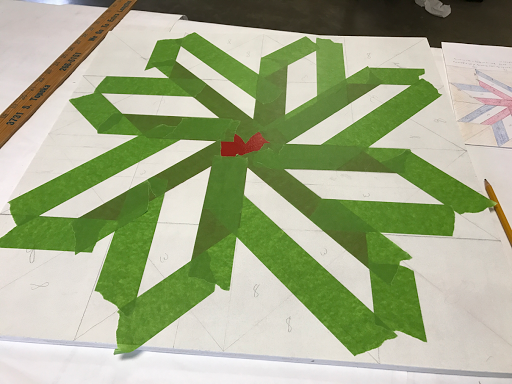
Some pictures from class...


These were class models. The pumpkin isn't as hunter orange as shown in this picture and was one I'd have loved to paint. They also had a fall, 4 color (or maybe 5) maple leaf pattern that would have been fun to paint. 


This woman (face removed as I had gotten her permission) was going to add a John Deere sticker to the middle of her quilt. 


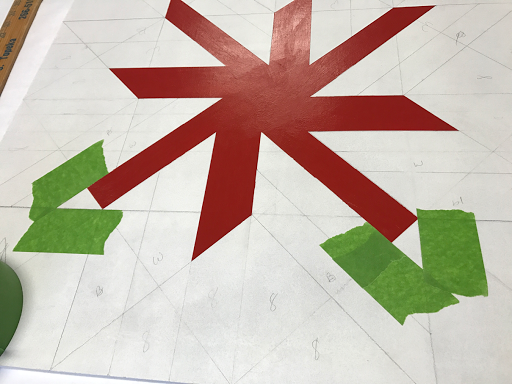
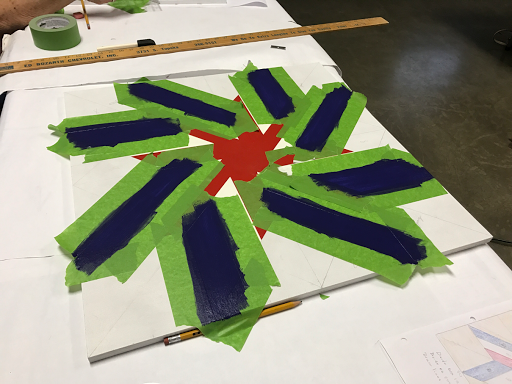
I love pinwheel quilts! 


A high schooler made this one. Her second. 


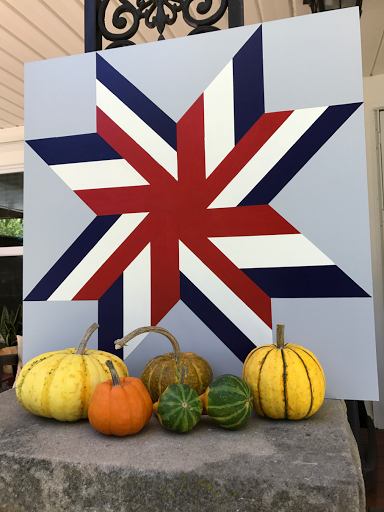
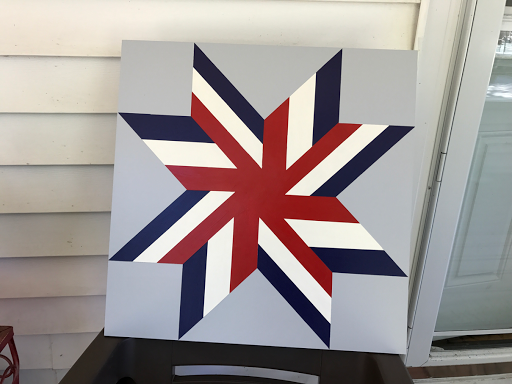
Her great grandmother if I understood it correctly made this one. I love the colors in it and loved how she left the corners light. 


Another tractor quilt. This woman's second quilt.


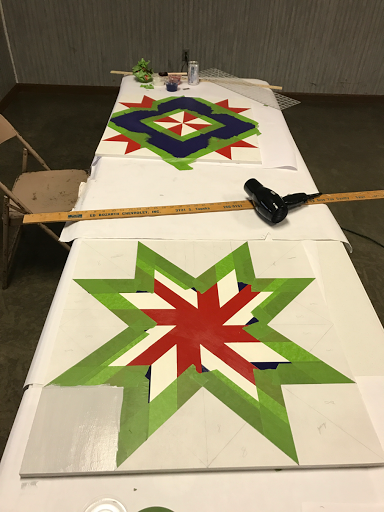
Two that hadn't finished before I left. I think there were four or more women who hadn't finished before I left. I am not a big sports fan, but I love the KSU theme in the lower quilt shown below. 


This is the first one I had really wanted to do (face removed, didn't have her permission). I still hope to some day do a sunflower, but I think I need to research the design a bit more. One or two of the ladies in my class did this pattern. It was a very popular design. 


The other one that I almost did. The four cats, minus the blank stripe at the bottom. I didn't do this one as I'd have had to mix colors to get colors that matched Homer, Lyncoln and Josey and I wasn't sure I could free hand eyes, nose and whiskers. Don't be surprised though if I some day make this one! 


This was a great, fun day and I thank Dede for getting me into the class. All supplies were provided, we just had to bring a yard stick, hair dryer and a sack lunch. Sadly there is only one more class this year and it's full. I did get a list of supplies though so I could make some own my own. I'd love to make four more. Yes, four! Two for the side of the garage and two for the side of the privacy fence. Or just stick with one, but have other blocks to switch it out with. The instructors had some really cute Christmas and fall designs I'd have loved to do. Maybe this winter...


Monday, October 16, 2017

Barn Quilt Class part 1

Saturday I got to take a barn quilt class up in Lancaster KS. 

Step one was to pick out the pattern you wanted to make. I had three I had wanted to make and it was hard settling on one. 

Next you draw out your design. You were given a drawing of the design and some basic instructions. It wasn't hard once you wrapped your head around it and figured how to divide the board. 


Then you tape and paint your first color. 


Notice my dark grid lines! I drew more lines than necessary, but that's how I rolled. We were given erasers and had the instructors had their way, I would have erased all the lines I hadn't needed and my notes to myself on colors.  Not how I roll! Of note, if you ever get to do this yourself, draw as faintly as you can. 


See my mistake? Even with all my grid marks, I messed up and squared off the ends of two red stripes. I've taped the area that needed to be filled in here and painted them in. 

There were 12 in my class and an intro wasn't given. I think that was in part due to the fact that more than half of the class had already attended another class and this was their second or third quilt. Another thing I learned afterwards is that you really want to press down on the tape edges to make certain paint doesn't bleed under the tape. Having painted enough in my house to have already learned that lesson, I didn't have any trouble, but others did. You also want to paint nice long strokes and per Dede, paint one coat one direction and the second coat the opposite direction. As if you were painting a cross. I didn't paint this way with most of the colors and up close you can tell that, but from a distance you can't. 


Starting my second paint color. I painted 4 coats of each color, though some got away with only 3 coats (probably hadn't marked all over their board!). 


Third color going on. You can see a little of the instruction graph in the above lower right corner. 


Between each coat, we used our hair dryer to dry the paint. You dried extra long after the final coat right before removing the tape. Paint that hadn't dried could peel when the tape was removed. 


Fourth color going on. I made a few mistakes. Three actually. All were corrected and you might still be able to see where the corrections were made up close, but not from a distance. 

My third mistake is shown below. See above right of the red center. The white strip is too short. I needed to trim the tape about a quarter of an inch at the bottom. The tape was wider than my strips and had to be trimmed with a razor blade. 


Here's my final piece. 


The mistakes aren't visiable. I'm very happy with the end results and hope to make some more soon. Stay tuned and I'll show you some pics of the other barn quilts that were made in my class. 


Friday, October 13, 2017

Ham and Cheese Pasta Bake

My mother likes Mr. Goodcents, but it's never been a place I'd pick to eat at. When we've eaten there, I normally get their chicken alfredo. This dish reminds me of Mr. Goodcents chicken alfredo and I think next time I make it I'll use precooked, frozen (and thawed) fajita chicken strips. 

I had gotten turkey ham at Aldi several weeks back and was looking for a recipe to use it in. This fit the bill, was easy, fast and I had everything but the half and half on hand. 


You won't use the entire ham and you might find it easier to get cubed ham from the grocery store or use left over ham. Or, as I'm going to try next time I make this recipe, use cooked cubed chicken. 

To start, boil 16 oz of pasta for 7 min or until al dente.  I used mostaccioli as I had it on hand. 


Drain and dump into a 6 qt crock pot. Add;

16oz cubed ham
1 16oz jar of alfredo sauce (I used a 15oz jar)
2 cups half and half
2 cups shredded mozzarella cheese

Stir and cook on low 3-4 hours or high 11/2-2 hours. I cooked it on high for an hour and half and it was perfect. 

I used this alfredo sauce. 


Comfort food perfect for a cold night. 


Tuesday, October 10, 2017

Crockpot Apple Sauce

This recipe appeared in my Pinterest newsfeed and the bloggers remarks made it sound good enough to try. 

Start by coring, peeling and chopping 5-6 lbs of apples. I used Granny Smith, galas, Fuji and a few Jonathan's. 


Stir in 1/2 cup of brown sugar, a Tbsp of cinnamon and 3/4 cup of water. 


I ran out of light brown sugar and had to use dark. 

Transfer to a crock pot and cook on low for 8 hours. 


Mash until you get the desired consistency. Cool and freeze in freezer safe containers.  

I left mine chunky. It filled 4 pint containers 3/4 full. It's very good and I'd make it again. 


It was cold and gray here today. I told the cats we were going to suffer through was it was going to warm back up. Lyncoln and Homer spent much of the day under covers, while long haired Josey enjoyed the cooler temps. 


He's not spoiled much. 


Sunday, October 8, 2017

You Can Do It!

And you can save yourself some cash by doing it yourself! 

Today I changed the filters in my Honda Element on my own and for a lot less than what I'd have paid to have it done. 


The first two are behind the glove box. 


They were disgusting. 


I'd just had my oil changed a few weeks ago and they were to check these. Guess they hadn't. 


New filters on the top. They weren't hard to remove or replace. 

The last filter is under the hood. 


There are 5 clips holding that chunk of plastic on. Remove those to find the filter. 


Dirty too. 


Yep, gross. 


All done. 


There are You Tube videos if you need instruction. You can also replace your own vehicle light bulbs. All parts can be purchased at an auto parts store for less than they'd charge you for them at the dealer. 

Wednesday, October 4, 2017

Pumpkins!

Pumpkins from friends Dede and Steves garden! 


I love all of them, but especially the orange, white and green pumpkins!


So pretty! Sadly I'm sure the squirrels will eventually find and sample them. 


Two itty bitty pumpkins I've got sitting on my kitchen window sill to enjoy. So cute!